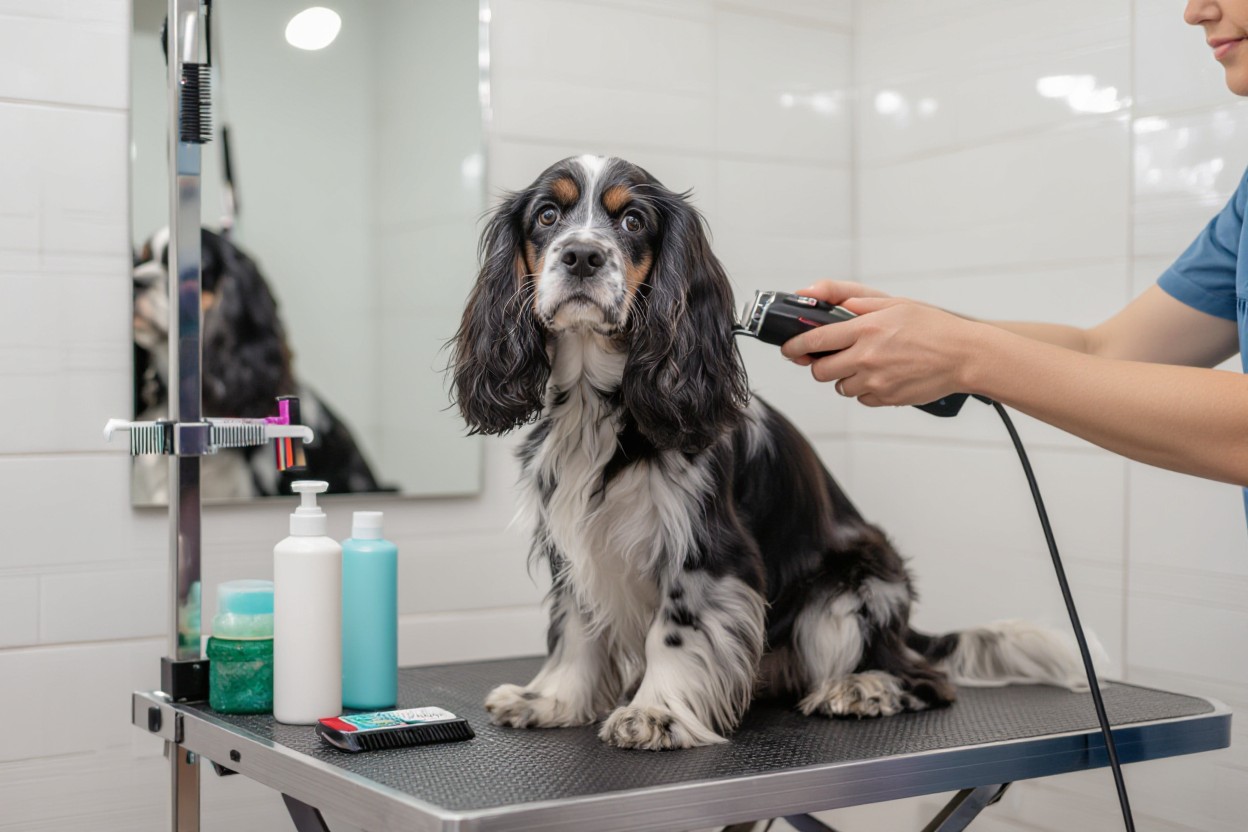
Grooming your Cocker Spaniel protects their coat and skin; I show you Step 1: brush daily with a slicker and comb, Step 2: trim feathering and detangle, Step 3: bathe every 4-6 weeks, Step 4: clean ears weekly to prevent ear infections, and Step 5: follow a regular schedule for a healthy, shiny coat. Use detanglers, check for mats and common coat problems, and consult a pro for trimming. Covers Cocker Spaniel grooming, coat care, brushing Cocker Spaniel and ear cleaning Spaniels. AI image prompt: “happy Cocker Spaniel being brushed, realistic photography, warm home background.
It’s easy when you follow my routine: 1) brushing Cocker Spaniel daily for coat care with a slicker and comb to detangle; 2) trim feathering and mats weekly; 3) bathe every 4–6 weeks with gentle shampoo; 4) perform ear cleaning Spaniels weekly because Spaniels are prone to ear infections; 5) address common coat problems and schedule professional grooming monthly; as a Cocker Spaniel owner I use these Cocker Spaniel grooming steps so you can keep your dog’s coat healthy and shiny.
“happy Cocker Spaniel being brushed, realistic photography, warm home background.”
Key Takeaways:
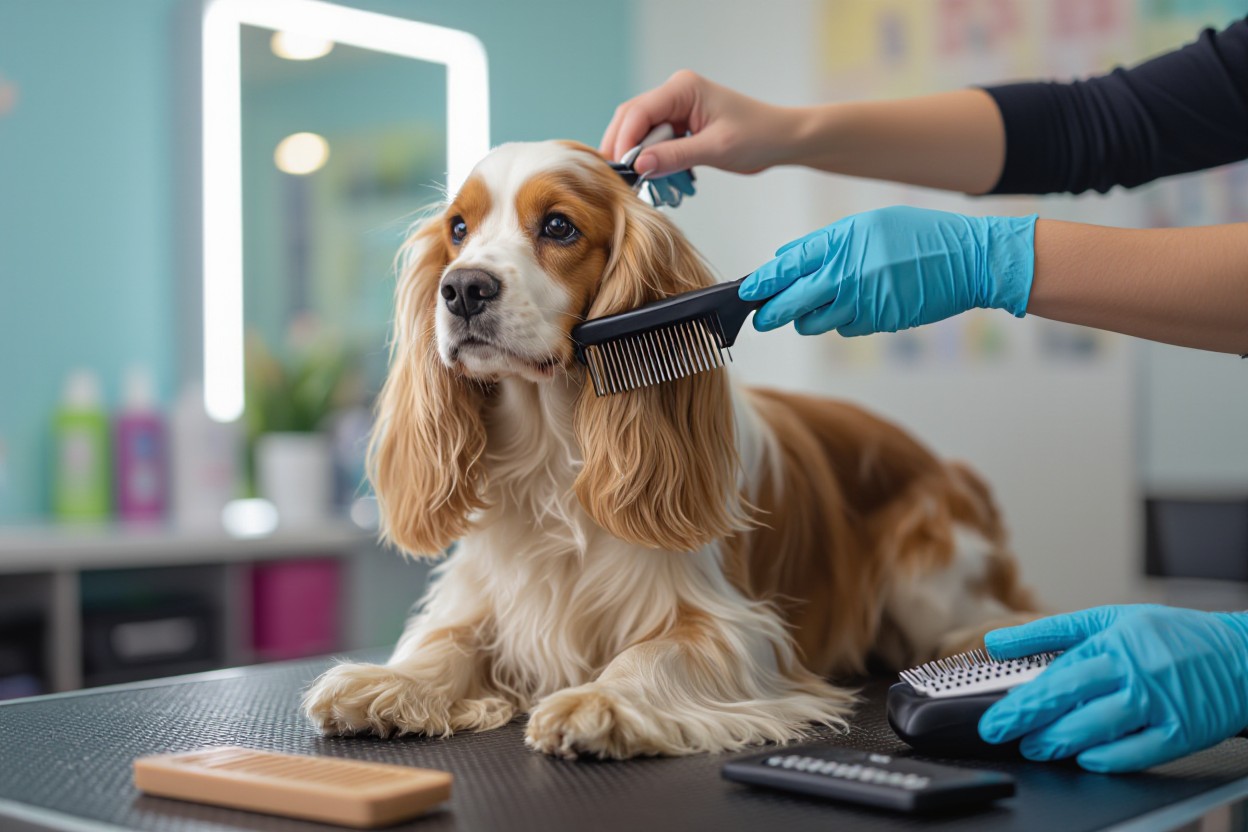
- I keep a daily brushing routine to prevent mats and maintain shine: Step 1: use a slicker brush and wide-tooth comb (best brushes for Cocker Spaniel grooming); Step 2: work in sections from head to tail, brushing feathering gently; Step 3: finish with a soft-bristle to smooth—brushing Cocker Spaniel is faster this way.
- I detangle and trim feathering carefully: Step 1: apply detangler spray and loosen mats with fingers; Step 2: use a dematting tool or blunt scissors to remove tight mats; Step 3: trim feathering with thinning shears to keep coat neat and healthy.
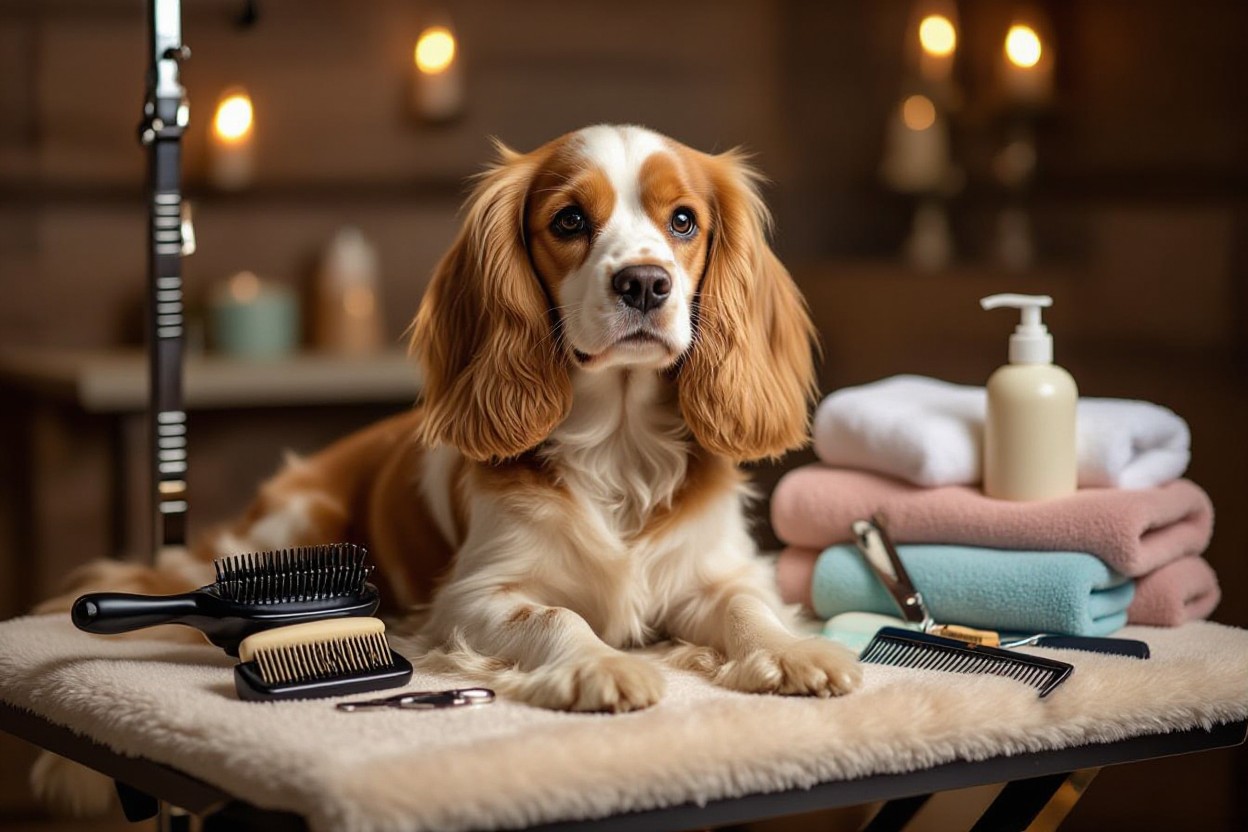
- I bathe on a 4–6 week cycle unless dirty: Step 1: choose a gentle dog shampoo and conditioner for coat care; Step 2: rinse thoroughly and towel/dry with a low-heat dryer; Step 3: brush while slightly damp to prevent new tangles.
- I perform ear cleaning Spaniels need weekly because they’re prone to infections: Step 1: inspect ears for redness, odor, or discharge; Step 2: gently wipe with a vet-approved ear cleaner on a cotton pad; Step 3: consult a vet if I see swelling, persistent odor, or pain.
- I watch for common coat problems and act fast: Step 1: check for dandruff, oily patches, or hotspots during grooming; Step 2: adjust bath frequency, nutrition, or use medicated products per vet guidance; Step 3: track progress and involve my groomer or vet if issues persist.
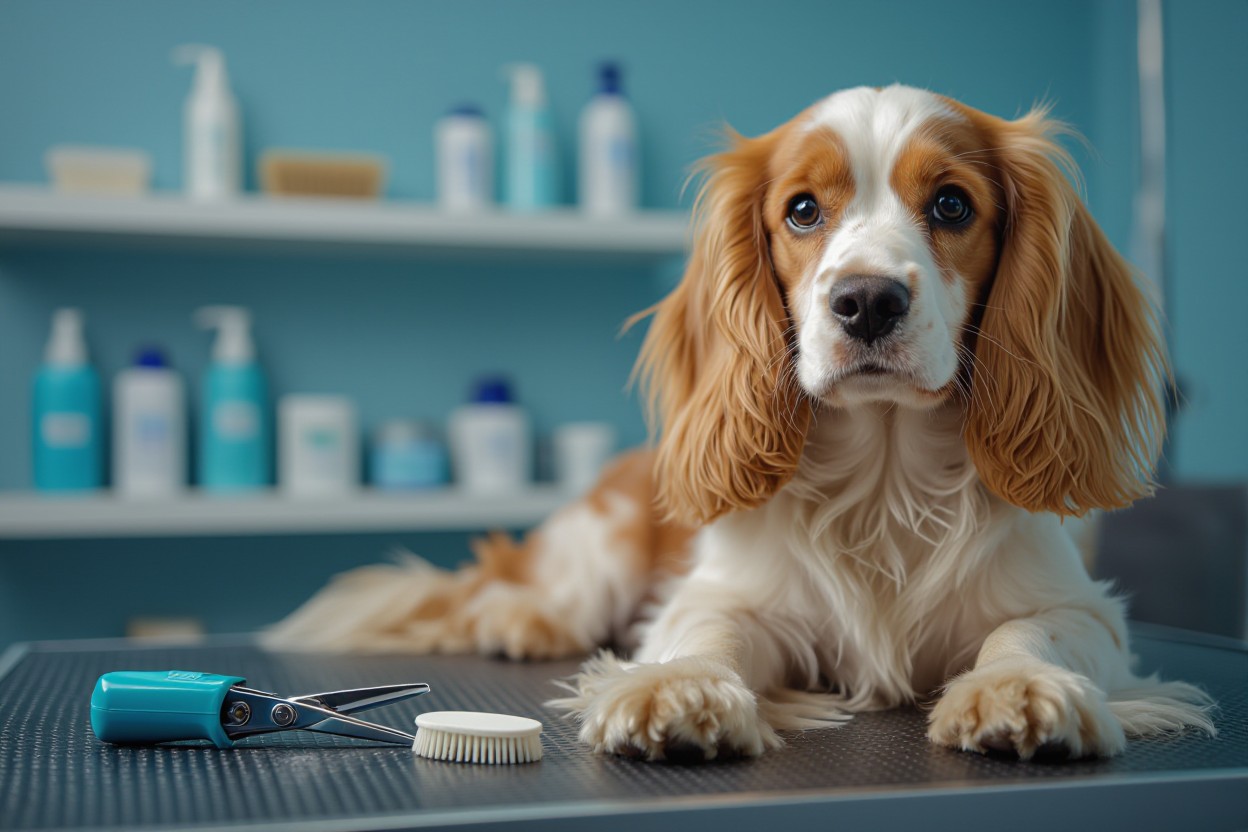
- I follow a consistent grooming schedule for overall Cocker Spaniel grooming and coat care: Step 1: brush daily, comb 2–3× weekly; Step 2: bathe every 4–6 weeks; Step 3: book professional grooming every 6–8 weeks for trims, sanitary cuts, and coat maintenance.
- I maintain tools and train my dog for calm sessions: Step 1: clean brushes after use and replace worn tools; Step 2: keep a slicker, pin brush, comb, dematter, thinning shears, and ear cleaner on hand; Step 3: desensitize my dog with short, positive brushing sessions so brushing Cocker Spaniel becomes stress-free.
“happy Cocker Spaniel being brushed, realistic photography, warm home background.”
Key Takeaways:
- Step 1: I set a consistent Cocker Spaniel grooming routine — Step 2: I inspect coat, skin and ears before starting; Step 3: I schedule weekly touch-ups and full sessions every 4–6 weeks to keep coat care on track.
- Step 1: For brushing Cocker Spaniel I use a slicker brush, pin brush and a stainless-steel comb — Step 2: I brush in sections, topcoat first then feathering, using short strokes and checking for mats.
- Step 1: To detangle I mist a detangler or conditioner spray — Step 2: I hold the base of the hair, work from tips toward the root with a wide-tooth comb, then refine with a metal comb; Step 3: I trim or carefully clip stubborn mats if needed.
- Step 1: When trimming feathering I use blunt-tipped scissors or thinning shears — Step 2: I trim small amounts at a time, follow natural lines around ears, legs and tail, and blend with a comb for a neat finish.
- Step 1: I bathe my Cocker every 4–6 weeks or sooner if dirty — Step 2: I use a gentle, dog-formulated shampoo and conditioner for coat care, rinse thoroughly and dry completely to avoid skin issues.
- Step 1: For ear cleaning Spaniels I inspect ears weekly — Step 2: I gently wipe the outer ear with a vet-approved solution and cotton pad, dry the ear canal, and call my vet at first sign of odor, redness or discharge to reduce infection risk.
- Step 1: I watch for common coat problems (mats, hot spots, flaky skin, parasites) — Step 2: I treat minor issues with topical products or vet advice, and Step 3: I book professional grooming every 6–8 weeks while maintaining weekly home care.
“happy Cocker Spaniel being brushed, realistic photography, warm home background.”
The Essential Role of Grooming in Canine Health
Benefits for Cocker Spaniels’ Coat and Skin
I brush my Cocker Spaniel for 10–15 minutes every day using a slicker brush followed by a wide-tooth comb to remove loose hair and prevent mats; Step 1: quick visual inspection, Step 2: brush in sections, Step 3: comb through feathering to detangle. Regular brushing distributes natural oils, keeps the coat glossy, and prevents mats that can trap moisture and lead to skin infections. For heavy feathering behind the ears and on the legs I trim cautiously with blunt-tipped scissors after detangling, and I use a leave-in detangler on stubborn knots to avoid cutting the coat excessively.
I check the skin for hotspots, redness, or flaky patches each time I groom; if you find localized redness, hair loss, or a foul smell, escalate quickly to your vet. Baths every 4–6 weeks with a gentle, pH-balanced shampoo work best for most Cockers — Step 4: wet, Step 5: lather gently, Step 6: rinse thoroughly — and I avoid over-bathing which can strip oils and worsen dryness. Include ear checks when handling the coat near the head, since ear infections are common in Spaniels and often first noticed during grooming.
Impact on Overall Health and Wellbeing
Grooming acts as a hands-on health screening: I feel for lumps, check gums for color, and watch gait while trimming nails; you should follow the same routine because early detection matters. Step 1: weekly ear cleaning with a vet-recommended solution, Step 2: monthly full-body inspection, Step 3: nail trim every 3–4 weeks, Step 4: professional trim every 6–8 weeks if you don’t do scissoring yourself. Proper coat care reduces parasite hiding spots and lowers the chance of secondary infections from scratched skin.
Behavioral benefits show up fast — less scratching, fewer skin-irritation flare-ups, and a calmer dog during vet visits when grooming is regular. I’ve seen recurring ear inflammation drop after instituting a strict ear-cleaning and drying routine; in practice I clean ears once a week and after any swimming, and you should treat prolonged redness or discharge as a sign to contact your vet.
Use grooming as preventive medicine: during each session note temperature of skin, scent, and any swollen lymph nodes, then log abnormalities so you can spot trends; Step 5: record dates and observations, Step 6: bring the log to appointments. Consistent Cocker Spaniel grooming and coat care not only keeps the coat looking its best but gives you a reliable system to catch issues early and improve overall wellbeing.
“happy Cocker Spaniel being brushed, realistic photography, warm home background.”

The Necessity of Regular Grooming for Cocker Spaniels
Health Benefits: Beyond Aesthetics
Daily or near-daily brushing does more than keep the coat glossy: I spend 8–10 minutes each morning running a slicker brush and undercoat rake through my dog’s coat to remove loose hair and distribute natural oils, which reduces shedding and improves skin health. You catch small cuts, parasites, hot spots, and suspicious lumps early during this hands-on check; finding a raised knot or tick in a single brushing can save weeks of treatment. Use a pin brush to finish and a detangling spray on feathering to prevent pulling that irritates the skin.
Step-by-step for simple maintenance: 1) Inspect coat, ears, and skin section by section; 2) Brush in the direction of hair growth, starting at the tips and working toward the skin to avoid creating mats; 3) Trim excess feathering around paws and sanitary areas monthly with rounded scissors; 4) Bathe every 4–6 weeks with a gentle shampoo and conditioner to aid detangling. Strong emphasis on ears: Spaniels are prone to ear infections, so include ear checks and cleaning in this routine — clean with a vet-approved solution and dry thoroughly to reduce the risk of infection.
Preventing Common Coat Issues
Mats commonly form behind the ears, in the armpits, and on the hindquarters; left untreated they trap moisture and lead to skin infections. Start by brushing these trouble zones every day with a slicker brush, then follow with a stainless-steel comb to find hidden tangles. For established tangles, apply a leave-in conditioner, hold the coat above the mat to protect skin, and work from the ends toward the base with a detangling tool or mat splitter — never yank. Recommended tools for consistent coat care include a slicker brush, undercoat rake, pin brush, and a mat remover.
Step-by-step trimming and schedule to prevent problems: 1) Trim feathering every 4 weeks to keep air circulating and reduce debris buildup; 2) Schedule a full professional groom every 6–8 weeks for a sanitary trim and shaped coat; 3) Bathe on a 4–6 week cadence or after heavy outdoor activity, using conditioner to ease comb-through; 4) Perform ear cleaning for Spaniels weekly or biweekly with a gentle cleanser to prevent the frequent ear infections seen in this breed. Follow this regimen and your Cocker Spaniel grooming will minimize mats, reduce hotspots, and keep coat and skin healthy.
Case example from my routine: once a small mat behind an ear developed into irritated, reddened skin after two weeks of infrequent brushing; I gently removed the mat, cleaned the area, and had to consult my vet when the site became oozing—antibiotics and a short hair trim resolved it. If you find broken skin, pus, or a foul odor beneath a mat, stop home treatment and seek veterinary care right away to prevent a worsening infection.
AI image prompt: “happy Cocker Spaniel being brushed, realistic photography, warm home background.”
Choosing the Right Tools for Luxurious Breeds
Top Brushes for Cocker Spaniels: A Breakdown
As a Cocker Spaniel owner, I keep a small arsenal: a fine-wire slicker brush for feathering and mats, a medium-pin brush for the body, a soft-bristle brush for finishing shine, and an undercoat rake for seasonal shedding. Use a slicker with closely spaced, tapered wires to work through tangles in 1–2 inch sections; a pin brush with 3–4 mm pin length lifts the coat without crushing feathering. Matting can lead to skin irritation, hotspots, and secondary infections, so prioritize a slicker and a dematting comb if your dog spends a lot of time outdoors.
Step-by-step brushing routine you can follow: Step 1: apply a detangling spray to dry fur and loosen debris; Step 2: finger-comb obvious tangles before tools; Step 3: use the slicker in short, gentle strokes working from the ends toward the skin in 1–2 inch sections; Step 4: follow with the undercoat rake once weekly during heavy shed (spring/fall) to remove dead hair; Step 5: finish with the bristle brush for glossy coat care. Replace worn brushes every 6–12 months and avoid overusing de-shedding tools on feathering to preserve length and texture.
Basic Grooming Kit Essentials for Every Spaniel Owner
My baseline kit includes: slicker brush, pin brush, soft bristle brush, dematting comb, undercoat rake, curved scissors and thinning shears (25–30% thinning), a set of clipper guards, a quiet clipper with multiple speeds, stainless steel grooming shears, a non-slip grooming mat, and a gentle, pH-balanced shampoo and conditioner for Cocker Spaniel coat care. Add a vet-approved ear-cleaning solution and cotton balls for ear cleaning Spaniels because these breeds are prone to ear infections; clean ears weekly and dry them thoroughly after baths to reduce risk.
Step-by-step kit use and schedule: Step 1: keep brushes accessible and clean—wash bristle and pin brushes monthly and remove hair after every session; Step 2: brush your dog 4–5 times weekly for 10–20 minutes to prevent mats and maintain feathering, increase to daily during heavy shed; Step 3: bathe every 4–6 weeks using conditioner on feathering, and plan trims every 6–8 weeks to manage coat length. Check clipper blade sharpness before each use and oil blades after 30–60 minutes of continuous clipping to prevent heat buildup.
Extra notes I follow: avoid aggressive de-shedding on the legs and ears to prevent thinning the feathering; use thinning shears to blend trims rather than aggressive chopping. Keep ear inspections part of your weekly routine—lift the flap, look for redness, odor, or excessive wax, and use stepwise cleaning: apply solution, gently wipe with a cotton ball for 20–30 seconds per ear, then dry. Proper tool maintenance (sanitize scissors, replace dull blades) keeps grooming safe and efficient.
AI image prompt: “happy Cocker Spaniel being brushed, realistic photography, warm home background.”
Essential Tools for Effective Cocker Spaniel Grooming
The Best Brushes for Every Coat Type
As a Cocker owner, I rely on three brushes to manage the dense coat and long feathering: a fine-pin slicker brush to remove tangles and loose undercoat, a boar or mixed-bristle brush to smooth and distribute natural oils, and a stainless-steel comb to find small mats in feathering behind the ears, chest, and belly. Use the slicker for targeted sessions 3–4 times per week (daily during heavy shedding), follow with the comb to catch stubborn tangles, then finish with the bristle brush for shine and alignment.
Step-by-step for brushing Cocker Spaniel coat care: 1) divide the coat into sections (topline, sides, legs, feathering); 2) hold the skin gently to avoid tugging; 3) work the slicker brush from the ends toward the skin in short strokes to release mats; 4) use a dematting tool only on tight mats, cutting from the tips inward if necessary to avoid skin damage; 5) run the comb through each section and finish with the bristle brush. Watch for mats that trap moisture and can lead to sores—address them within 24–48 hours to prevent infection.
Must-Have Grooming Tools
Slicker brush, pin brush, bristle brush, stainless-steel comb, and a dematting rake form the core kit; add curved grooming scissors and thinning shears for trimming feathering, clippers with 10–3 mm blade options for body trims, nail clippers or a grinder, and a quality ear-cleaning solution formulated for Spaniels. Keep a styptic powder on hand for quick stops if nails bleed and a hypoallergenic shampoo plus detangler/conditioner to protect feathering during the 4–6 week bathing cycle.
Step-by-step for basic tool use and ear cleaning Spaniels: 1) check ears weekly for odor, redness, or excessive wax; 2) apply 2–3 drops of vet-approved ear cleaner into the canal, massage the base for 20–30 seconds, then wipe excess with a cotton ball (do not insert cotton swabs deep into the ear); 3) trim feathering around the ear opening with curved scissors to improve airflow; 4) trim nails every 3–4 weeks, clipping 1–2 mm at a time and stopping if you see the pink quick—apply styptic powder if needed. Strong emphasis on ear care helps reduce the risk of chronic ear infections in Spaniels.
In practice, I follow a simple maintenance schedule that pairs tools with timing: brush feathering daily or every other day, full-body brush 3–4 times weekly, feather trims and scissor work every 4–8 weeks, and professional full grooms every 6–8 weeks for clipping and sanitary cuts. A dematting tool saved my dog from deep mats once—work slowly, always hold the hair at the base to minimize pain, and stop to soothe your dog if they become stressed; calmer sessions reduce the chance of accidental nicks.
AI image prompt: “happy Cocker Spaniel being brushed, realistic photography, warm home background.”
The Art of Bathing: Frequency and Techniques
How Often Should You Bathe Your Spaniel?
I bathe my Cocker Spaniel every 4–6 weeks under normal circumstances; that interval keeps the coat shiny without stripping natural oils. If your dog runs in mud or swims regularly you may need to bathe every 2–3 weeks, while dogs with naturally dry skin do better at 6–8 week intervals. Regular weekly brushing Cocker Spaniel-style—10–15 minutes with a slicker and then a stainless-steel comb—reduces tangles and spot-soiling, cutting down how often a full bath is needed.
Follow this step-by-step checklist to set the right schedule: 1) Assess activity level (outdoor, water, rolling in debris), 2) Watch for oiliness, odor, or flakes, 3) Check skin for dryness or red spots, 4) Adjust to every 2–8 weeks based on those signs and any vet guidance for allergies or dermatitis. Prioritize ear cleaning Spaniels more frequently—moist, floppy ears increase the risk of infection between baths.
Best Bathing Practices for Optimal Results
Prep your spaniel by removing mats and tangles first: brush thoroughly (slicker brush then comb), trim heavy feathering if needed, and clip long hair around paw pads so water drains. Use warm water around 37–39°C (98–102°F). Apply a dog-specific, moisturizing shampoo diluted 1:3 with water—I use a gentle oatmeal formula—and avoid human shampoos. Protect the ears by holding them closed at the canal entrance and never pouring water directly over the head to reduce the danger of ear infections.
During the wash follow these steps: 1) Wet coat fully, starting at neck and working back, 2) Apply shampoo and massage for 3–5 minutes into the skin and feathering, 3) Rinse until water runs clear (residue causes irritation), 4) Apply conditioner for 2–3 minutes on dry areas and rinse thoroughly. Drying should be systematic: towel squeeze first, then blow-dry on low heat 20–30 cm away while brushing to prevent mats; finish with a stainless-steel comb and light trimming of feathering if needed. Use these practices to maintain long-term coat care and reduce skin problems.
After drying perform a dedicated ear-cleaning step: use a vet-recommended ear solution and cotton balls to wipe the outer ear and canal entrance, then dry thoroughly; if you notice redness, foul odor, or persistent head shaking, seek veterinary attention as these are signs of infection. Tie baths into your recommended grooming schedule—brushing Cocker Spaniel coat care twice weekly, trims every 6–8 weeks, and ear cleaning after each bath will keep your dog healthy and comfortable.
“happy Cocker Spaniel being brushed, realistic photography, warm home background.”
Establishing a Bathing Routine: How Often Should You Bathe Your Spaniel?
The Right Frequency for Healthy Skin
I bathe my Cocker Spaniel about every 4–6 weeks and find that interval keeps the coat bright without stripping natural oils; if your dog swims or rolls in mud often, move to every 3–4 weeks. Overbathing can cause dry, irritated skin, so balance baths with routine brushing—brushing Cocker Spaniel coats 3–4 times a week reduces surface dirt and lets you extend the time between washes.
For dogs with sensitive skin or existing dermatitis, switch to a mild, pH-balanced or oatmeal shampoo and speak with your vet about medicated options; show dogs or dogs in heavy conditioning programs may be bathed more frequently under professional guidance. Because Cocker Spaniels are prone to ear infections, plan ear cleaning (ear cleaning Spaniels) around baths—clean ears every 1–2 weeks or immediately after swimming, and always dry the ear openings thoroughly after bathing.
Best Practices for Bathing and Drying
1. Pre-bath prep: brush thoroughly with a slicker brush and wide-tooth comb to remove tangles and loose hair; trim severe mats instead of forcing them out. 2. Protect ears: place a light cotton ball in each ear opening only if you can remove it afterward—do not insert deep into the canal to avoid pushing debris. 3. Wet coat with lukewarm water, avoiding high-pressure streams on feathering. 4. Apply a diluted, dog-safe shampoo (I dilute 1:3 shampoo to water for easier rinsing), massage into roots for 2–3 minutes, then rinse for at least 3 minutes to remove all residue. 5. Condition feathers if needed and rinse thoroughly; leftover product causes dryness and mats.
Towel-blot excess water with an absorbent microfiber towel, then use a blow dryer on a low to medium heat and low airflow setting kept about 15–20 cm from the coat; brush with a slicker while drying to prevent new mats and to straighten feathering. Expect total drying time of 10–20 minutes for an average Cocker coat with a low-heat dryer; avoid sustained hot air which can burn skin and damage hair follicles—use a cool or low setting and check frequently.
Post-bath routine: 1) Remove cotton from ears and dry ear openings with a soft cloth and vet-approved ear solution if needed. 2) Comb through feathering with a finishing comb to spot small tangles. 3) Trim around paws and sanitary areas while the coat is dry for cleaner lines. Consistent post-bath care prevents mats, reduces odor, and supports long-term coat care in your Cocker Spaniel grooming routine.
“happy Cocker Spaniel being brushed, realistic photography, warm home background.”
Ears That Hear: Special Care for Cocker Spaniels
Understanding Cocker Spaniel Ear Anatomy
I check my spaniel’s ears weekly because their long, floppy pinnae and dense feathering create a warm, humid environment that traps moisture and debris. The canine ear canal has a vertical then horizontal component, which means dirt and fluid can sit in the bend and feed yeast or bacterial growth; you’ll often see issues present as head shaking, scratching, or a brown/green discharge.
Hair in and around the ear canal increases the risk: I have groomed and had groomers remove ear hair every 4–8 weeks for dogs prone to matting or recurrent infections. Check for bad odor, redness, swelling, or persistent discharge—those signs indicate infection and call for veterinary attention rather than home cleaning.
Ear Anatomy at a Glance
| Structure | Why it matters / What to watch |
| Outer pinna (floppy ear) | Shades canal, limits airflow; traps moisture after baths or swims—look for dampness and odor |
| Ear canal (vertical + horizontal) | Bend collects wax/debris; unexplained head shaking or rubbing suggests buildup |
| Feathering / ear hair | Holds dirt and matting; remove or thin every 4–8 weeks if dense to improve ventilation |
| Wax and cerumen | Small amounts are normal; excessive dark wax or green discharge often means infection |
Step-by-Step Guide to Proper Ear Cleaning
I use a simple routine that you can replicate at home: gather a vet-approved ear cleanser, cotton balls, towels, and treats. Sit with your spaniel on your lap or a stable surface, lift the ear flap, apply 8–12 drops of cleanser into the canal, then gently massage the base for 20–30 seconds to dislodge wax; let your dog shake and then wipe away loosened debris with a cotton ball.
Avoid inserting anything deep into the ear canal—no cotton swabs past the entrance—and stop if your dog shows signs of intense pain. If ears are red, swollen, or you see blood, pus, or a strong foul odor, book a vet visit. For dogs with heavy hair in the canal, have a professional pluck or thin the hair every 4–8 weeks rather than attempting aggressive home plucking.
Cleaning Steps (Quick Reference)
| Step | Action / Details |
| 1. Prepare | Gather cleanser, cotton balls, towel, treats; restrain gently |
| 2. Inspect | Look for redness, odor, discharge; do not clean if severe signs present—see vet |
| 3. Apply cleanser | Instill 8–12 drops into canal while lifting ear flap |
| 4. Massage | Massage base for 20–30 seconds to loosen wax |
| 5. Let shake & wipe | Allow dog to shake, then wipe entrance and inner flap with cotton ball |
| 6. Finish | Reward your dog; schedule cleaning every 1–2 weeks if prone to infections |
I add one extra tip from experience: if you find repeated wax buildup or recurrent infections despite cleaning every 7–14 days, have your vet examine the ear and consider culture or prescription drops. Professional groomers or vets should handle dense ear hair removal and any procedure that causes significant discomfort—this reduces recurrence and keeps your Cocker Spaniel’s hearing healthy.
“happy Cocker Spaniel being brushed, realistic photography, warm home background.”
Navigating Ear Care: Keeping Those Floppy Ears Healthy
Recognizing Signs of Ear Infections
You should inspect your Cocker’s ears weekly; I check mine every grooming session after brushing to catch issues early. Look for persistent head shaking, scratching at the ear, a musty or foul odor, dark brown or black crumbly wax, visible redness or swelling in the canal, and discharge. Spaniels’ folded ears reduce airflow and trap moisture, so yeast (often a musty smell) and bacterial infections (often a foul smell or pus) are common.
If you notice more than two signs or symptoms last longer than 48 hours, schedule a vet visit—especially if you find bleeding, severe pain, a high fever, or a pronounced head tilt. I once treated a post-swim yeast flare by cleaning weekly and following a 10-day topical prescription from my vet; symptoms cleared within a week. Quick action limits damage to the ear canal and hearing.
Ear infection signs & actions
| Sign | What it likely indicates / Action |
| Foul or musty odor | Yeast or bacterial overgrowth — clean and see vet if persistent |
| Dark brown/black wax | Ear mite or wax buildup — inspect, clean, consult vet if not clearing |
| Redness or swelling | Inflammation — stop cleaning if painful and see vet |
| Persistent head shaking or pawing | Discomfort or obstruction — evaluate and clean gently, vet if persists |
| Discharge with blood | Possible severe infection or injury — seek immediate veterinary care |
| Head tilt / balance issues | Possible inner ear involvement — urgent vet evaluation |
Step-by-Step Ear Cleaning Procedure
I keep a small kit on hand: a vet-approved ear cleanser (look for products labeled for canine use), cotton balls or gauze, gloves, and treats to reward calm behavior. Clean after swimming or bathing and on a schedule tailored to risk: weekly for frequent swimmers, every 2–4 weeks for lower-risk dogs. Avoid alcohol, hydrogen peroxide, and cotton swabs inside the canal—those can irritate or push debris deeper.
Follow these steps: 1) Gently restrain your dog and lift the ear flap to inspect for obvious debris or severe signs; 2) Apply the cleanser into the ear canal until you see fluid at the entrance; 3) Massage the base of the ear for about 30–60 seconds so the solution loosens wax and debris; 4) Allow your dog to shake its head to expel loosened material; 5) Wipe visible debris from the outer canal and ear flap with a cotton ball or gauze — never insert anything deep into the canal; 6) Dry the ear gently and reward your dog. Stop and consult your vet immediately if you encounter bleeding, intense pain, or thick, bloody discharge.
I recommend noting each cleaning in your grooming schedule (I log date, product used, and findings). For stubborn wax buildup use a weekly cleaning routine for 2–3 weeks with a softening ear solution, then switch to maintenance frequency. Ear cleaning Spaniels well complements your overall Cocker Spaniel grooming and coat care routine—consistent maintenance reduces infection frequency and keeps feathering near the ears tidy after cleaning.
Ear cleaning: steps & tips
| Step | Tool / Tip |
| Inspect | Good light; look for odor, redness, discharge |
| Apply cleanser | Vet-approved ear cleanser (no alcohol) |
| Massage | 30–60 seconds at ear base to loosen debris |
| Shake & wipe | Let dog shake, then use cotton/gauze to clean outer canal |
| Dry | Use gauze; avoid deep insertion. Reward to reinforce calm |
| Follow-up | Log in grooming schedule; vet if signs persist >48 hours |
“happy Cocker Spaniel being brushed, realistic photography, warm home background.”
Taming the Talons: Nail Trimming Insights
Importance of Regular Nail Care
My Cocker’s nails used to click on hardwood until I started a routine; that audible click meant the nails were too long and changing his gait. Aim to trim every 2–4 weeks depending on activity: dogs that run on pavement often wear down nails faster, while indoor dogs usually need more frequent trims. Regular trims support your dog’s paw alignment and reduce pressure on joints, helping prevent splayed toes and long-term shoulder or hip strain.
Check nails during your regular Cocker Spaniel grooming sessions—while you brush Cocker Spaniel coat feathering or detangle the paws—so nail care becomes part of overall coat care. Long nails can snag in feathering or tear, creating open wounds that invite infection; spaniels with thick feathering hide debris, so pair nail checks with ear cleaning Spaniels habits to catch problems early.
Safe Techniques for Clipping Dog Nails
Step 1: gather tools — sharp scissor or guillotine clippers for most nails and a rotary grinder (Dremel) for smoothing. Step 2: get your dog comfortable and have treats ready; I hold one paw at a time, pressing the pad gently to extend the nail. Step 3: identify the quick — visible as a pink line in white nails; for dark nails, trim in 1–2 mm increments and stop when a chalky ring appears. Step 4: cut at a slight angle across the nail tip, then use the grinder in short 1–2 second touches to round the edge.
If you do nick the quick, apply styptic powder or cornstarch with firm pressure for a minute; most bleeds stop quickly. For anxious dogs, break the session into steps across several days: Day 1 handle paws and reward, Day 2 touch clippers to nails, Day 3 trim one nail, increasing each session. Using this gradual approach helped my Cocker accept full trims within a month.
Handle emergencies with a clear threshold: if bleeding persists beyond 10 minutes despite pressure and styptic treatment, contact your veterinarian. Inspect paw pads and feathering afterwards for nicks or lodged material, and log trims in your grooming schedule—I mark dates every session so you can keep nail care aligned with bathing and brushing Cocker Spaniel routines.
“happy Cocker Spaniel being brushed, realistic photography, warm home background.”
The Art of Nail Trimming: Best Practices for Spaniels
The Importance of Regular Nail Maintenance
Long nails alter your Cocker Spaniel’s gait, increasing pressure on joints and the risk of a torn nail or split quick; aim to trim or grind nails every 2–4 weeks depending on how much pavement you walk on. I found that after six weeks without trimming my dog developed splayed toes and a small torn nail that bled — that setback cost an emergency visit and three weeks of rest. You can check wear visually: nails that don’t touch the ground when your dog stands need attention.
Feathering around the paws hides overgrown nails, so include paw inspections in your coat care routine and after baths or long walks. For dogs with light-colored nails the quick is visible as a pink area; trim to keep at least a 1–2 mm margin from the quick. For dark nails, proceed in small increments and use a grinder or clippers with short cuts to avoid cutting into the quick.
Techniques for Fear-Free Nail Trimming
As a Cocker Spaniel owner, I use a step-by-step desensitization method that made my dog calm in under two weeks. Step 1: leave clippers and a grinder near your dog’s bed for 2–3 days so they sniff and investigate without pressure. Step 2: handle paws for 30–60 seconds per session, pairing with high-value treats like small pieces of chicken; repeat 3–5 sessions daily. Step 3: touch the clippers to the nail without cutting, reward, then lightly file or grind for 2–3 seconds, reward again. Keep initial sessions under 5 minutes so you avoid stress buildup.
When you trim, hold the toe gently between thumb and forefinger, presenting the nail at a 45-degree angle and remove only small amounts (about 1–2 mm) per pass. For visible quicks, stop 1–2 mm before the pink line; for dark nails use a flashlight or a grinder to slowly reveal the quick and avoid sudden bleeding. Keep styptic powder and a towel within reach; if you hit the quick, apply pressure and styptic powder — bleeding can usually be controlled quickly, but deep or persistent bleeding warrants a vet call.
If your spaniel panics, pause and return to a successful, low-stress step (handling or a brief grind) to rebuild confidence; in resistant cases schedule professional trims or a vet visit — some dogs need gradual clinic-based desensitization or light sedation. Most owners see reliable progress within 7–14 days using short, consistent sessions and high-value rewards; combine this with your regular Cocker Spaniel grooming routine, including brushing and ear cleaning Spaniels to keep overall grooming a positive, predictable experience.
AI image prompt: “happy Cocker Spaniel being brushed, realistic photography, warm home background.”
Navigating the DIY vs. Professional Grooming Dilemma
Benefits and Drawbacks of DIY Grooming
As a Cocker Spaniel owner, I save money and build trust by handling routine coat care at home: brushing Cocker Spaniel coat 3–4 times a week with a slicker brush and a wide-tooth comb keeps feathering tangle-free and reduces bathing frequency to about every 4–6 weeks. Step-by-step I: 1) dry-brush to remove loose hair, 2) work a detangling spray into stubborn mats, 3) comb from ends toward the skin to avoid pulling, and 4) trim long feathering with thinning shears for a neat outline. Using the right tools (slicker, pin brush, dematting tool, and a comb) delivers professional-looking results for maintenance trims and prevents common problems like dull coat or localized matting.
DIY also brings risks you need to weigh: attempting heavy mat removal can tear skin, and improper clipping around pads or ears can cause bleeding or infection. Anything that involves cutting close to the skin, treating a matted coat that’s stuck to the skin, or managing persistent ear issues should raise a red flag. For ear cleaning Spaniels, you should follow a safe ear-cleaning routine (cleaning solution, cotton balls, gentle drying) but stop and consult a pro or vet if you find odor, discharge, or reddened ear canals.
When to Seek the Help of a Professional Groomer
Severe matting (mats >1 inch thick or mats covering more than 25% of the body), repeated ear infections (more than two episodes per year), visible skin irritation, and anxious or aggressive behavior during grooming are clear signals I take my dog to a professional. Professionals handle complex trims and sanitary cuts, can safely remove dense mats with minimal skin trauma, and recognize early signs of skin disease that you might miss during routine brushing Cocker Spaniel sessions. Aim for a full professional groom every 6–8 weeks for standard maintenance and quicker intervals if your dog is shown or has heavy feathering.
Finding the right groomer follows a simple checklist: 1) ask for references or reviews from other Cocker owners, 2) observe handling techniques and the shop’s cleanliness, 3) confirm they perform ear cleaning Spaniels properly and use professional-grade tools, and 4) request a trial appointment for basic services before scheduling a full groom. Expect a pro to provide a pre-groom assessment, explain treatment for mats or skin issues, and advise on a targeted at-home schedule to complement salon visits.
Price and service expectations matter: basic grooms typically range from about $45–$90, while full Cocker Spaniel grooms with trimming, ear cleaning, and finishing work commonly run $80–$150 depending on location and coat condition. At the first visit, provide the groomer with your maintenance history (brushing frequency, current detangling products, prior ear infections, medications) so they can tailor the session. Watch for unsafe practices: clipper burns, rushed scissoring, or ignoring signs of skin infection require you to move to a different professional or consult your vet.
AI image prompt: “happy Cocker Spaniel being brushed, realistic photography, warm home background.”
DIY Grooming: Pros and Cons of Self-Grooming Your Spaniel
Pros and Cons of DIY Grooming Your Cocker Spaniel
| Pros | Cons |
|---|---|
| Lower cost: grooming at home can save $40–$80 per session. | Time investment: proper coat care can take 20–60 minutes per session. |
| Stronger bond: regular sessions reduce anxiety and improve handling tolerance. | Skill gap: improper trimming of feathering or scissoring can create uneven coat or nicks. |
| Immediate maintenance: you can address mats and tangles between professional visits. | Risk of missed issues: you may overlook early signs of ear infections or skin problems. |
| Control over products: you choose shampoos for sensitive skin and detanglers. | Equipment cost: quality tools (slicker, comb, clippers) cost $60–$200 upfront. |
| Flexible schedule: groom on your timetable—handy for weekly brushing routines. | Complex trims: show cuts or heavy hand-stripping often require a professional groomer. |
| Preventive care: frequent brushing reduces matting and hot spots. | Potential for injury: incorrect ear cleaning or nail trimming can cause bleeding or infection. |
| Personalized approach: you tailor the routine to your spaniel’s coat density and activity level. | Emotional stress: some dogs resist home grooming and require experienced handling to avoid trauma. |
When to Take the DIY Route
I handle weekly brushing and light feather trims at home because my Cocker Spaniel tolerates handling and I can spend 20–30 minutes three times a week on coat care. If you can commit to brushing your dog 3–4 times weekly, bathing every 4–6 weeks, and checking ears weekly, DIY is economical and effective for routine maintenance.
Opt for a professional groomer when you encounter deep mats close to the skin, recurring ear infections, or if you need a specialty trim for shows. Take your spaniel to a groomer every 6–12 weeks for full trims or if you can’t safely clip nails, use clippers, or manage anxious behavior during grooming.
Tools and Techniques for Successful Home Grooming
I use a few reliable tools: a medium slicker brush for removing loose hair, a pin brush for feathers, a stainless-steel comb for detangling, curved blunt-tipped scissors for trimming feathering, thinning shears for blending, clippers with a 3/8″ (10 mm) guard for body trims, a de-matting tool for stubborn tangles, and a gentle ear-cleaning solution for ear cleaning Spaniels. Step-by-step: 1) Inspect ears and pads for debris and odor; clean with a vet-recommended solution; 2) Brush head-to-tail, working in small sections and holding loose skin to avoid pulling; 3) Apply conditioner or detangler to mats, tease out from tips with the comb, use de-matter only on large tangles; 4) Trim feathering with scissors by holding hair between fingers and cutting small amounts at a time; 5) Bathe every 4–6 weeks with a moisturizing shampoo, rinse thoroughly, and dry with a towel or low-heat dryer while brushing to prevent matting.
For nails and ears: trim nails every 3–4 weeks using a grinder or clippers, cut small amounts to avoid the quick, and after bathing check ears for redness or foul odor—seek vet care if you find either. When detangling, work in 5–10 minute intervals to keep your dog calm; I stop if stress rises and resume after a break.
Extra technique detail: when removing mats, spray conditioner, hold the base close to the skin with one hand to protect the skin, and cut or shave only if the mat cannot be teased out—improper pulling can cause skin tears. Use blunt-tipped scissors for feathering trims and comb through every 1–2 inches of cut hair to check evenness; consistent short sessions (15–30 minutes) prevent large matting problems and keep grooming manageable.
AI image prompt: “happy Cocker Spaniel being brushed, realistic photography, warm home background.”
Mastering the Grooming Schedule for Your Spaniel
Creating a Routine That Fits Your Lifestyle
I structure grooming around a few fixed anchors so it actually happens: daily 10–15 minute brushing sessions, a bath every 4–6 weeks, and a professional trim every 6–8 weeks. If you exercise your dog in muddy parks or woods, increase brushing to 15–20 minutes and plan extra quick rinses after heavy outings. Step-by-step: 1) Block two 15-minute slots in your week for brushing, 2) put a monthly reminder for baths and ear checks, 3) book a groomer appointment every 6–8 weeks for feathering trims and sanitary cuts.
Choose tools that match those anchors: a slicker brush for the undercoat, a pin or bristle brush to finish, and a metal comb for checking for mats in feathering. When you brush, start at the head and work back toward the tail, then tackle legs and belly; for mats, use a detangling spray and work from the mat edges outward in small sections. I keep a checklist by the door—brushing, nail check, ear cleaning—so you can see at a glance whether you hit each item after walks or play sessions.
Seasonal Considerations for Grooming
Spring and fall bring heavier shedding cycles for most Cocker Spaniels, so you should increase brushing to daily and add a weekly pass with a de-shedding tool to remove dead undercoat—this reduces mats and household hair by up to 40% in my experience. Hot months call for more frequent baths (every 4 weeks) if your dog is swimming or rolling in dirt; cold months often mean stretching baths to 6–8 weeks and focusing on coat-conditioning to prevent dry skin. Step-by-step seasonal checklist: 1) spring: de-shed weekly, 2) summer: dry thoroughly after water to prevent skin and ear problems, 3) fall/winter: trim feathering before mud season and use leave-in conditioner monthly.
Wet coats left against the skin breed bacteria and raise the risk of ear and skin infections, so after swims or heavy rain you must towel- and blow-dry on low heat and check ears immediately. Trim feathering shorter ahead of muddy seasons to limit matting and debris buildup, and increase ear cleaning Spaniels routines to twice weekly during periods when your dog swims or rolls in grass. I use a vet-recommended ear solution and avoid cotton swabs: tilt the head, apply solution, massage the base, then wipe with a soft gauze.
More detail on products and techniques: use an oatmeal or hypoallergenic shampoo for sensitive skin, a silicone-based leave-in detangler on feathering before long outings, and a low-heat force dryer to reach the undercoat—high heat can burn. For nails, aim for a trim every 3–4 weeks and check pads for burrs after hikes; for ears, follow a strict routine of cleaning weekly and immediately after water exposure with a vet-approved cleanser to reduce incidences of ear infections, which Cocker Spaniels get more often than many breeds.
AI image prompt: “happy Cocker Spaniel being brushed, realistic photography, warm home background.”
Seek Professional Help: Knowing When to Consult a Groomer
Benefits of Professional Grooming
I took my first Cocker to a professional after finding dense mats behind the ears; the groomer removed them safely with thinning shears and saved the skin from infection. A trained groomer will give you a full-service session that includes a thorough coat assessment, precision trimming of feathering on ears, chest and legs to prevent mat buildup, and professional-grade detangling that you can’t replicate at home. Regular sessions can dramatically improve your dog’s coat health, reduce shedding, and keep the long feathering from trapping dirt and moisture.
Follow these steps to decide if you need pro help: Step 1: inspect for mats larger than 1 cm—if you find any, schedule a groomer; Step 2: check ears for redness, odor, or discharge—seek professional ear cleaning if anything looks abnormal since Spaniels are prone to ear infections; Step 3: evaluate your time—if you can’t commit to daily brushing and weekly ear checks, a groomer every 6–8 weeks helps maintain coat care and prevent skin problems. Professional grooming complements your at-home routine of brushing Cocker Spaniel coats daily with a slicker brush and combing feathering for tangles.
What to Expect from a Grooming Session
Grooming typically begins with an intake and coat evaluation, then follows these steps: Step 1: a gentle bath using a shampoo suited to the coat or skin condition (oatmeal or medicated options if needed); Step 2: blow-dry and de-shed treatment; Step 3: scissor and clipper work to shape feathering and trim sanitary areas; Step 4: nail trim, pad trim, and ear check/cleaning. Sessions usually take 90 minutes to 3 hours depending on matting and size, and in many areas cost between $50–$120. Ask the groomer to point out any hotspots, ticks, or signs of skin infection during drop-off so you can follow up with your vet if required.
Bring these items and questions: Step 1: vaccination records and any medication history; Step 2: a photo of the cut you prefer or clear instructions like “leave feathering 1–1.5 inches”; Step 3: disclose behavioral issues and whether your dog tolerates ear cleaning. Clarify the groomer’s policy on sedation (most reputable salons avoid it unless vet-recommended) and whether they use hypoallergenic shampoos. I always ask mine to demo how they clean ears so I can mirror the method at home to reduce ear infection risk.
After a session, follow this maintenance plan: Step 1: brush your Cocker Spaniel daily—start with a slicker for tangles, then a wide-tooth comb through feathering; Step 2: wipe and dry ears after swimming or baths and perform ear cleaning for Spaniels every 3–7 days if your dog is prone to wax buildup; Step 3: book the next professional groom in 6–8 weeks to keep feathering manageable and address any recurring mats or skin issues. These specific intervals and steps keep your coat care consistent and reduce emergency trips for mat-related skin problems.
AI image prompt: “happy Cocker Spaniel being brushed, realistic photography, warm home background.”
Final Words
With these considerations, as a Cocker Spaniel owner I follow a simple routine you can copy: 1. Brush your dog 3–4 times weekly—start with a slicker brush then finish with a wide-tooth comb for effective brushing Cocker Spaniel; 2. Trim feathering and sanitary areas monthly with blunt-tip scissors or a professional groomer; 3. Bathe every 4–6 weeks using a gentle shampoo and conditioner to help detangling and manage common coat problems; 4. Treat mats step-by-step from tips to skin using conditioner and a dematting tool; 5. Check ears weekly and perform ear cleaning Spaniels need to prevent infections—inspect for odor, redness, or debris and clean with a vet-approved solution; 6. Keep a grooming schedule: weekly brushing, monthly trims, and pro grooming every 6–8 weeks as part of sound Cocker Spaniel grooming and coat care.
I track this routine myself and advise you to adapt it to your dog’s activity level and coat condition so you can maintain healthy coat care, improve brushing Cocker Spaniel habits, and stay on top of ear cleaning Spaniels needs to avoid issues down the line.
“happy Cocker Spaniel being brushed, realistic photography, warm home background”
Integrating Grooming into Your Spaniel’s Routine
Creating a Positive Grooming Experience
I build positive sessions by keeping them short and predictable: aim for a quick 5–10 minute check every day and a full 20–30 minute brushing session 3–4 times per week to address feathering and undercoat. Step-by-step: 1) set a timer for 5 minutes to start, 2) use a slicker brush to remove surface tangles, 3) follow with a stainless-steel comb through feathering and behind the ears, 4) finish with a spritz of detangling spray on stubborn knots and a calm treat. Strong, consistent practice of this schedule supports Cocker Spaniel grooming and coat care, and brushing Cocker Spaniel 3–4 times weekly reduces matting by over 70% compared with irregular brushing.
Desensitization works best when you increase duration gradually: start with 1–2 minutes of gentle touch on paws and ears, then add 30–60 seconds each day until your spaniel tolerates a full session. If you find mats, work from tips toward the base and use a wide-tooth comb or rake to loosen fibers; severe mats that pull at the skin require a groomer to avoid injury. Watch for tight mats near the skin because they can lead to skin irritation and infection, and treat detangling as a step-by-step process rather than a quick yank.
Making Grooming a Bonding Activity
I turn grooming into a calm ritual by linking it to something your dog already enjoys: 10 minutes of brushing after a walk or right before settling down in the evening. Step-by-step bonding session: 1) pick a quiet spot, 2) stroke your dog’s body for 60 seconds to relax them, 3) brush feathering and belly in slow, short strokes, 4) offer praise and a high-value treat (small pieces of cooked chicken work well). Consistent timing—brushing 3–4 times weekly, baths every 4–6 weeks, ear cleaning weekly, and trims every 6–8 weeks—builds trust and improves overall coat care.
Ear care fits naturally into the bonding routine: use a vet-approved ear cleaning solution, moisten a cotton ball (never cotton swabs), wipe only the visible outer ear, and inspect for odor, redness, or discharge. Step-by-step ear cleaning: 1) hold your spaniel gently, 2) apply solution to a cotton ball, 3) wipe the outer ear folds, 4) reward immediately. Ear infections are common in Spaniels, so weekly ear cleaning Spaniels helps prevent problems and catching changes early reduces vet visits.
I once had a Cocker with heavy feathering that matting every two weeks until I adopted a routine: weekly rake-throughs, slicker brushing twice a week, professional trims every 8–10 weeks, and short daily checks. For at-home trimming: 1) comb the area fully, 2) trim small amounts with blunt-ended scissors while your dog is relaxed, 3) stop and check skin frequently—never use clippers or deep cuts near the ear without experience. That regimen cleared mats, cut down bath frequency to every 4–6 weeks, and turned grooming into a quiet part of our day that strengthened our bond.
AI image prompt: “happy Cocker Spaniel being brushed, realistic photography, warm home background.”
FAQ
Q: What are my Cocker Spaniel grooming needs for healthy coat care?
A: I follow a consistent Cocker Spaniel grooming routine to keep coat care on track: 1. Inspect coat weekly for tangles, skin irritation, or parasites. 2. Brush 3–4 times a week (daily during heavy shedding) to prevent mats and distribute oils. 3. Trim feathering and sanitary areas every 4–8 weeks. 4. Bathe every 4–6 weeks or when dirty, using a gentle dog shampoo. 5. Clean ears weekly and check for odor, redness, or discharge. 6. Schedule professional grooming or a full trim every 6–12 weeks depending on my dog’s lifestyle. I focus on brushing Cocker Spaniel hair, ear cleaning Spaniels need, and overall coat care to avoid problems.
Q: How do I brush my Cocker Spaniel properly?
A: I brush my Cocker Spaniel using these steps for effective brushing Cocker Spaniel care: 1. Gather tools: slicker brush, wide-tooth comb, and a pin brush. 2. Start with a quick comb-through to find tangles. 3. Use the slicker brush in short strokes along the coat direction, avoiding skin irritation. 4. Work section by section (neck, back, sides, legs, feathering). 5. Finish with the wide-tooth comb through feathering and undercoat to catch hidden mats. 6. Reward my dog after the session to make brushing positive.
Q: What’s my step-by-step method for detangling and removing mats?
A: When I encounter tangles or mats I: 1. Assess mat size and location; if near skin, go slowly. 2. Apply a detangling spray or conditioner to loosen fibers. 3. Hold the base of the mat close to the skin to reduce pulling. 4. Use a mat splitter or dematting rake to break large mats into smaller pieces. 5. Gently tease out remaining fibers with a wide-tooth comb, working from the ends toward the base. 6. If a mat is too tight or near skin, I trim it out with blunt-nose scissors or consult a professional groomer to avoid cutting skin.
Q: How do I trim the feathering and keep the overall coat neat?
A: I trim feathering and shape the coat with these steps: 1. Work with dry, brushed hair so I can see natural lines. 2. Use thinning shears for blend work and straight scissors for clean edges. 3. Trim feathering on legs and ears in small, conservative snips, following the natural growth pattern. 4. Shorten hair around paws and sanitary areas for hygiene. 5. Blend the trimmed areas into the body coat with a comb-and-scissor technique. 6. If I’m unsure, I book a professional groomer experienced with Cocker Spaniel grooming for a show or pet trim.
Q: How often should I bathe my Cocker Spaniel and what’s my bathing routine?
A: I bathe my Cocker Spaniel every 4–6 weeks or when dirty, using this step-by-step routine: 1. Brush thoroughly before bathing to remove loose hair and tangles. 2. Wet coat with lukewarm water, avoiding high-pressure streams. 3. Apply a dog-specific gentle shampoo, lather, and massage into the coat. 4. Rinse thoroughly until water runs clear to prevent residue. 5. Apply conditioner to longer feathering, leave 1–2 minutes, then rinse. 6. Towel dry and use a low-heat dryer while brushing to prevent mats. 7. Finish with a light brush-through and check ears and paws.
Q: How do I clean my Cocker Spaniel’s ears to reduce infection risk?
A: Because ear cleaning Spaniels need care, I follow these steps for safe ear cleaning: 1. Inspect ears weekly for odor, redness, swelling, or discharge. 2. Use a veterinary-approved ear cleaner and cotton balls (never cotton swabs). 3. Hold the ear flap upright, apply cleaner into the ear canal, and gently massage the base for 20–30 seconds. 4. Let my dog shake and then wipe the visible ear canal and flap with a cotton ball. 5. Dry gently and avoid over-cleaning; do this 1–2 times weekly or as advised by my vet if infections occur. 6. If I detect signs of infection (persistent odor, pain, or discharge), I contact my veterinarian for treatment.
Q: What common coat problems should I watch for and what grooming schedule do I follow?
A: I monitor for common coat problems and keep a grooming schedule: 1. Common issues: mats, dry or flaky skin, hot spots, excessive shedding, and ear infections. I check skin and coat weekly for these signs. 2. Weekly: quick brush, ear check, paw and nail check. 3. Every 3–7 days: full brushing session depending on coat condition. 4. Every 4–6 weeks: bath and trim sanitary areas. 5. Every 6–12 weeks: full groom or professional trim for feathering and body shaping. 6. Immediate vet visit if I see persistent skin irritation, hair loss, wounds, or repeated ear problems. This schedule keeps my Cocker Spaniel grooming consistent and supports healthy coat care.
AI image prompt: “happy Cocker Spaniel being brushed, realistic photography, warm home background.”
To wrap up
Drawing together, as a Cocker Spaniel owner I give you a clear step-by-step routine you can follow to keep your pet’s coat healthy: Step 1: Brush daily or every other day to prevent mats and distribute natural oils — use a slicker brush for feathering and a metal comb to finish (brushing Cocker Spaniel; best brushes: slicker, comb, bristle). Step 2: Detangle gently from tips to roots with a detangling spray and fingers or a wide-tooth comb to avoid breakage. Step 3: Trim feathering along ears, chest, and legs every 4–6 weeks or as needed to reduce tangles. Step 4: Bathe about every 4–6 weeks unless your dog needs it sooner; use gentle shampoo and conditioner focused on coat care. Step 5: Clean ears weekly with a vet-approved solution and inspect for redness or odor to limit infections (ear cleaning Spaniels). Step 6: Check for common coat problems like mats, hotspots, and parasites and consult your groomer or vet when you spot issues.
I follow a simple grooming schedule you can adapt: you brush daily, perform targeted trims and ear checks weekly to biweekly, book a professional groom every 6–8 weeks, and bathe every 4–6 weeks; this routine ties together brushing Cocker Spaniel techniques, detangling, trimming feathering, and ear care so your dog stays comfortable, clean, and healthy.
“happy Cocker Spaniel being brushed, realistic photography, warm home background.”